


Introduction
The RecyclerView is one of the Android components with a certain complexity in the implementation, and when it comes to having two nested RecyclerView the complexity can increase.
In this tutorial we will learn how to nest two RecyclerView to achieve the result as shown in the following image.

Model of the application
In this article we will try to have a data structure that will force us to have two nested RecyclerView, we will have a Book entity and another BookCategory entity.
@Parcelize
data class Book(
    val id: String,
    val title: String,
    val imageRes: Int
) : Parcelable

@Parcelize
data class BookCategory(
    val id: String,
    val title: String,
    val books: List<Book>
) : Parcelable
Gradle Configuration
The dataBinding is a feature that is not active by default when we create a new project with Android Studio, so we will enable dataBinding in the build.gradle file of the app module.
Note : To have access to the Parcelize annotation that we recently used on our entities it is also necessary to activate the experimental Android Extensions feature, this annotation allows to automatically generate the methods found in the Parcelable interface.
When you use dataBinding, it generates a certain amount of classes, that’s why you have to apply the kotlin-kapt plugin.
apply plugin: 'kotlin-kapt'

androidExtensions {
    experimental = true
}

android {
    dataBinding {
        enabled true
    }

    // .....
}
Book Cell : For Nested RecyclerView
As our entities are ready, we are now going to create two layouts, one that will represent a Book and the other one that will represent a category of books, as we are going to use dataBinding it means that we are going to inject in the layout that represents a book item a book object , and in the layout that represents a category of books a BookCategory type object.
<?xml version="1.0" encoding="utf-8"?>
<layout xmlns:app="http://schemas.android.com/apk/res-auto"
    xmlns:tools="http://schemas.android.com/tools"
    xmlns:android="http://schemas.android.com/apk/res/android">

    <data>
        <import type="androidx.core.content.ContextCompat" />
        <variable
            name="book"
            type="org.ericampire.android.myapplication.Book" />
    </data>

    <androidx.constraintlayout.widget.ConstraintLayout
        android:layout_width="wrap_content"
        android:layout_height="wrap_content">

        <ImageView
            android:id="@+id/imageView"
            android:layout_width="150dp"
            android:layout_height="200dp"
            android:layout_marginStart="8dp"
            android:layout_marginLeft="8dp"
            android:layout_marginTop="8dp"
            android:layout_marginEnd="8dp"
            android:layout_marginRight="8dp"
            android:scaleType="centerCrop"
            android:src="@{ContextCompat.getDrawable(context, book.imageRes)}"
            app:layout_constraintEnd_toEndOf="parent"
            app:layout_constraintStart_toStartOf="parent"
            app:layout_constraintTop_toTopOf="parent"
            tools:src="@drawable/book" />

        <TextView
            android:layout_width="wrap_content"
            android:layout_height="wrap_content"
            android:layout_marginTop="16dp"
            android:layout_marginBottom="8dp"
            android:text="@{book.title}"
            tools:text="Android Programming"
            app:layout_constraintBottom_toBottomOf="parent"
            app:layout_constraintEnd_toEndOf="@+id/imageView"
            app:layout_constraintStart_toStartOf="@+id/imageView"
            app:layout_constraintTop_toBottomOf="@+id/imageView" />

    </androidx.constraintlayout.widget.ConstraintLayout>
</layout>
Book Category Cell : For Outer RecyclerView
As the BookCategory class has a title and a Book list, the layout will contain two elements, firstly a TextView which will display the title of the category and secondly a RecyclerView which will be used to display the list of books available in the category, and as in the previous case, we will inject in the layout item_category_book an object of type BookCategory
<?xml version="1.0" encoding="utf-8"?>
<layout xmlns:android="http://schemas.android.com/apk/res/android"
    xmlns:app="http://schemas.android.com/apk/res-auto"
    xmlns:tools="http://schemas.android.com/tools">

    <data>
        <variable
            name="bookCategory"
            type="org.ericampire.android.myapplication.BookCategory" />
    </data>

    <androidx.constraintlayout.widget.ConstraintLayout
        android:layout_width="match_parent"
        android:layout_height="wrap_content">

        <TextView
            android:id="@+id/textView"
            android:layout_width="wrap_content"
            android:layout_height="wrap_content"
            android:layout_marginStart="16dp"
            android:layout_marginLeft="16dp"
            android:layout_marginTop="16dp"
            android:text="@{bookCategory.title}"
            android:textColor="@android:color/black"
            android:textSize="18sp"
            app:layout_constraintStart_toStartOf="parent"
            app:layout_constraintTop_toTopOf="parent"
            tools:text="Title" />

        <androidx.recyclerview.widget.RecyclerView
            android:id="@+id/nestedRecyclerView"
            android:layout_width="match_parent"
            android:layout_height="wrap_content"
            android:layout_marginStart="8dp"
            android:layout_marginLeft="8dp"
            android:layout_marginTop="8dp"
            android:layout_marginEnd="16dp"
            android:layout_marginRight="16dp"
            app:setBooks="@{bookCategory.books}"
            android:orientation="horizontal"
            app:layoutManager="androidx.recyclerview.widget.LinearLayoutManager"
            app:layout_constraintEnd_toEndOf="parent"
            app:layout_constraintStart_toStartOf="parent"
            app:layout_constraintTop_toBottomOf="@+id/textView"
            tools:itemCount="10"
            tools:listitem="@layout/item_book" />


    </androidx.constraintlayout.widget.ConstraintLayout>
</layout>
If you analyse the previous file carefully, you will notice that the RecyclerView has an unusual attribute app:setBooks which takes as value the books contained in the category, this attribute has been created by the following code and allows to pass data to the nested RecyclerView
@BindingAdapter(value = ["setBooks"])
fun RecyclerView.setBooks(books: List<Book>?) {
    if (books != null) {
        val bookAdapter = BookAdapter()
        bookAdapter.submitList(books)

        adapter = bookAdapter
    }
}
To create a new attribute on a particular View you just have to create an extension function on the concerned class and put the BindingAdapter annotation to define the name of the attribute.
In our case, the line app:setBooks=”@{bookCategory.books}” will use the setBooks method, passing the books of the bookCategory object as parameters, and the setBooks method creates an adapter that takes the data to be displayed and then we assign this adapter to the RecyclerView. Isn’t that great?
The preview of the item_book_category.xml file looks like the following image
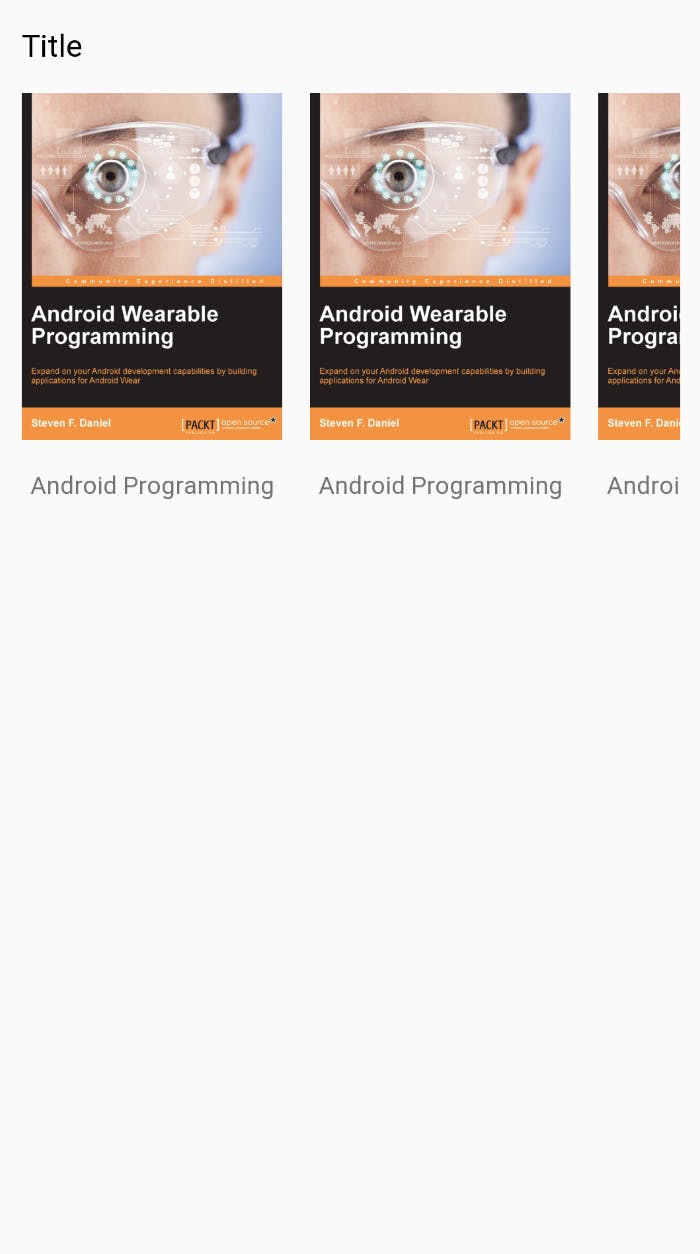 item_book_category.xml Preview
Implemente RecyclerView adapter
BookAdapter
In the previous code we declared an object of Type BookAdapter that we used as an adapter for the RecyclerView of the file item_book_category.xml, here is what the BookAdapter class looks like
// ViewHolder
class CustomViewHolder(val binding: ViewDataBinding) : RecyclerView.ViewHolder(binding.root)


class BookAdapter : ListAdapter<Book, CustomViewHolder>(Companion) {
    companion object : DiffUtil.ItemCallback<Book>() {
        override fun areItemsTheSame(oldItem: Book, newItem: Book): Boolean {
            return  oldItem === newItem
        }

        override fun areContentsTheSame(oldItem: Book, newItem: Book): Boolean {
            return  oldItem.id == newItem.id
        }
    }

    override fun onCreateViewHolder(parent: ViewGroup, viewType: Int): CustomViewHolder {
        val inflater = LayoutInflater.from(parent.context)
        val binding = ItemBookBinding.inflate(inflater, parent, false)

        return CustomViewHolder(binding)
    }

    override fun onBindViewHolder(holder: CustomViewHolder, position: Int) {
        val currentBook = getItem(position)
        val itemBinding = holder.binding as ItemBookBinding
        itemBinding.book = currentBook
        itemBinding.executePendingBindings()
    }
}
The BookAdapter class inherits from the ListAdapter class requiring two type parameters :
The first type parameter represents the type of object to be displayed in the RecyclerView and in our case this object is of type Book,
The second type parameter represents the ViewHolder, in our case the ViewHolder of type CustomViewHolder and as we decided to use dataBinding, the CustomViewHolder class has a binding property of type ViewDataBinding. The ViewDataBinding class is the super class of all the classes that will be generated from a layout, we will see this in the following article.
The constructor of the ListAdapter class takes as unique parameter an object of type DiffUtil.ItemCallBack<Book> this object allows to check if two elements of the list are identical or not. In our case, the DiffUtil.ItemCallBack<Book> class is defined as a companion object inside the BookAdapter class, and to access this object you just have to use the keyword Kotlin Companion.
ListAdapter methods
The ListAdapter class forced us to redefine two methods in the BookAdapter class, the onCreateViewHolder method and the onBindViewHolder method.
The onCreateViewHolder method: This method allows us to create the CustomViewHolder which renders as a parameter a ViewDataBinding object in our case ItemBookBinding. The CustomViewHolder class will be used to bind data with layout item_book. As we use dataBinding we get the layout item_book by its binding class ItemBookBinding, this class was generated from the item_book file.xml and that we will use to inject the data in the layout, Note that in the item_book.xml file I had declared a book variable of type Book, this variable will be directly accessible from the ItemBookBinding class generated from the item_book.xml file.
The onBindViewHolder method : the onBindViewHolder method takes as first parameter the ViewHolder which is of type CustomViewHolder previously created and the position of the current element of the list. In the onBindViewHolder method we retrieve the current element from the getItem(position) method then we retrieve the binding class from the binding property of the ViewHolder by initializing the variable book declarer in the file item_book.xml after having casted the binding class contained in the ViewHolder into ItemBookBinding and finally we call the method itemBinding.executePendingBindings() to make the binding.
BookCategory Adapter
The BookCategoryAdapter class follows the same logic as the previous adapter, with some differences ready to be explained.
RecyclerView.RecycledViewPool : The BookCategoryAdapter class has a viewPool property of type RecyclerView.RecycledViewPool, this property is used in the onBindViewHolder method which will ensure that the recycling of nested RecyclerView views is optimized.
onBindViewHolder method : In the onBindViewHolder method, we retrieved the RecyclerView from the file item_book_category.xml to which we assigned the viewPool by the method setRecycledViewPool(viewPool).
class BookCategoryAdapter : ListAdapter<BookCategory, CustomViewHolder>(Companion) {
    private val viewPool = RecyclerView.RecycledViewPool()

    companion object : DiffUtil.ItemCallback<BookCategory>() {
        override fun areItemsTheSame(oldItem: BookCategory, newItem: BookCategory): Boolean {
            return  oldItem === newItem
        }

        override fun areContentsTheSame(oldItem: BookCategory, newItem: BookCategory): Boolean {
            return  oldItem.id == newItem.id
        }
    }

    override fun onCreateViewHolder(parent: ViewGroup, viewType: Int): CustomViewHolder {
        val inflater = LayoutInflater.from(parent.context)
        val binding = ItemBookCategoryBinding.inflate(inflater, parent, false)

        return CustomViewHolder(binding)
    }

    override fun onBindViewHolder(holder: CustomViewHolder, position: Int) {
        val currentBookCategory = getItem(position)
        val itemBinding = holder.binding as ItemBookCategoryBinding

        itemBinding.bookCategory = currentBookCategory
        itemBinding.nestedRecyclerView.setRecycledViewPool(viewPool)
        itemBinding.executePendingBindings()
    }
}
Putting it all together
The file activity_main.xml will contain the higher level RecyclerView which will have as an adaptation BookCategoryAdapter
<?xml version="1.0" encoding="utf-8"?>
<layout xmlns:android="http://schemas.android.com/apk/res/android"
    xmlns:app="http://schemas.android.com/apk/res-auto"
    xmlns:tools="http://schemas.android.com/tools">

    <data>

    </data>

    <androidx.constraintlayout.widget.ConstraintLayout
        android:layout_width="match_parent"
        android:layout_height="match_parent"
        tools:context=".MainActivity">

        <androidx.recyclerview.widget.RecyclerView
            android:id="@+id/outerRecyclerView"
            android:layout_width="0dp"
            android:layout_height="0dp"
            app:layout_constraintBottom_toBottomOf="parent"
            app:layoutManager="androidx.recyclerview.widget.LinearLayoutManager"
            tools:itemCount="4"
            tools:listitem="@layout/item_book_category"
            app:layout_constraintEnd_toEndOf="parent"
            app:layout_constraintStart_toStartOf="parent"
            app:layout_constraintTop_toTopOf="parent" />
    </androidx.constraintlayout.widget.ConstraintLayout>
</layout>
And for the sake of simplicity, we are going to create a method that will generate for us the data that we will spend to adapt it.
fun getData(): ArrayList<BookCategory> {
    val bookCategory = arrayListOf<BookCategory>()
    for (a in 1..5) {
        val bookList = arrayListOf<Book>()
        for(b in 1..5) {
            val book = Book("$b", "Book Title $b", R.drawable.book)
            bookList += book
        }

        bookCategory += BookCategory("$a", "Category title $a", bookList)
    }

    return bookCategory
}
Connect BookCategoryAdapter to the RecyclerView
class MainActivity : AppCompatActivity() {

    override fun onCreate(savedInstanceState: Bundle?) {
        super.onCreate(savedInstanceState)
        setContentView(R.layout.activity_main)

        val bookCategoryAdapter = BookCategoryAdapter()
        bookCategoryAdapter.submitList(getData())
        outerRecyclerView.adapter = bookCategoryAdapter
    }
}
Conclusion
The RecyclerView is one of the Android components that seems complex to handle and having two RecyclerView to handle may still seem complicated, I hope the elements provided in this article will make things easier for you in your daily handling of the RecyclerView.
If you want to see the source code more closely, the source code is available on the following link
If you have any kind of feedback, feel free to connect with me on Twitter.
https://twitter.com/eric_ampire
Reference.
eric-ampire/nested-recycler-view Contribute to eric-ampire/nested-recycler-view development by creating an account on GitHub.github.com
Android RecyclerView With Data Binding and Coroutine Introductionmedium.com